Sausage with Cajun Alfredo

Sausagewithcajunalfredo

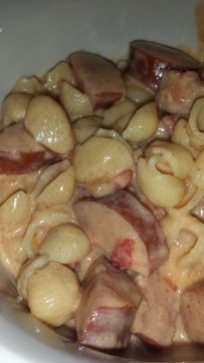
I feel like a genius after having made this dinner. This only came about because I thought I had everything I needed for dinner…until time to make dinner and it turns out I had about half. Half one one recipe and half of another.

My first reaction was panic. I’m not usually the “wing it” cook. But, I knew the two recipes well enough that I thought I could mix it. Of course, when Hubs asked what was for dinner I answered with a  “we’ll see!” Turns out, it was a blessing for our tummies!

So I combined my Sausage Pasta with Tomato Cream Sauce (cajun style) with my Cheesy Garlic Chicken Alfredo.

Sausage Cajun Alfredo

You’ll need:


For the Alfredo:
2 cups milk
4 ounces cream cheese (1/2 a block)
2 Tbs flour
½ tsp salt
3 Tbs butter
1 cup grated Mozzarella cheese ( or Cheddar!)20160516_171323.jpg

For the Sausage pasta:
8+ ounces penne pasta (or whatever you prefer, I used small shells)
12 oz smoked sausage or Chicken!
14-oz can petite diced tomatoes with onion, drained well
1 teaspoon garlic powder
1-2 Tablespoons cajun seasoning
Salt and pepper to taste

What to do:

First, I started my pasta cooking and then made the Alfredo just as I do for the regular recipe:

Use a mixer or blender to mix together the milk, flour, salt, and cream cheese until it is smooth. I also added butter to this mix and heated it until it thickens then added the shredded cheese and let it sit.

Then, while those two were going, I sliced up my sausage and sautéed it and then added my tomatoes and onion, garlic and cajun spices, and a little S&P. Mix well

Finally, once my Alfredo was ready I slowly stirred it into my pan of sausage. making sure to coat everything and mix in the cajun spice. Then I added the pasta and mixed again.

This was one of the best outcomes of not having what you need!! This mix may be one of my favorites!

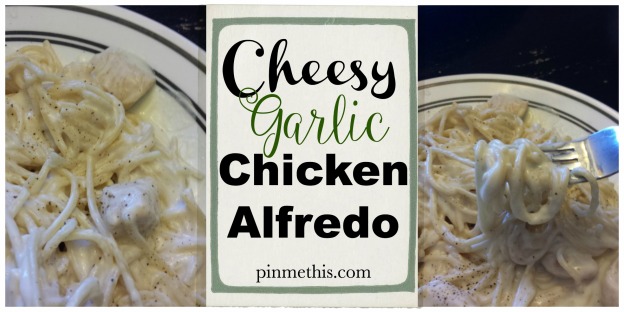
Cheesy Garlic Chicken Alfredo


Cheesygarlicchickenalfredo

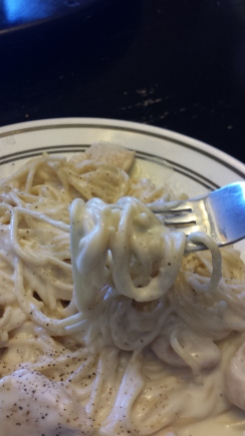
Cheesy Garlic Chicken Alfredo! After one bite the hubby said, “Oh, wow”. Yes, it’s that good. The pin from Eazy Peazy Mealz was for SHRIMP Alfredo. I decided to make this after I shopped, so chicken it was. But this would be oh so good with shrimp!!

The original post also says this is a 30 minute meal. It took me a little longer than that. I think after some practice and with shrimp (shorter cooking time) it will be closer to the 30 min mark. But ABSOLUTELY try this!!

You’ll need:

2 cups milk
4 ounces cream cheese (1/2 a block)
2 Tbs flour
½ tsp salt
3 Tbs butter
3 Tbs minced garlic (I used just shy of a Tbs of garlic powder)
1 cup grated Mozzarella cheese
⅓ cup parmesan cheese (optional)
Pepper to taste
1 lb peeled and deveined shrimp or chicken, cut into small pieces or strips (as I did)

Pasta of choice (I used thin spaghetti)

20160516_171323.jpg

What to do:

Use a mixer or blender to mix together the milk, flour, salt, and cream cheese until it is smooth. Then set it aside.

20160516_172725.jpg

Next, you’ll melt your butter and garlic in a sauce pan then add your shrimp or chicken to cook. Once it’s cooked, set it aside, removing it from the pan and leave the remaining butter and garlic . Cook up your pasta per the box directions.

Next add the milk mixture to the pan you just used to cook the shrimp or chicken. Stir until it comes to a simmer and then continue to stir until it thickens.20160516_175010.jpg

Remove it from the heat and add the mozzarella and parmesan cheeses. Cover and let it sit for about 5 minutes.

20160516_175526.jpg

Yum! Steamy!

Add your shrimp or chicken and let it stand for about another 5 minutes.

My Alfredo was quite thick and super cheesy at this point so I put it back over a medium-ish heat and stirred in a little milk at a time until it thinned out. I served it over thin spaghetti, my hubby’s favorite, and seasoned with a little pepper.

This was so good. Like, you’d order in a restaurant good. Best off all, my lunch leftovers were great!

Update!

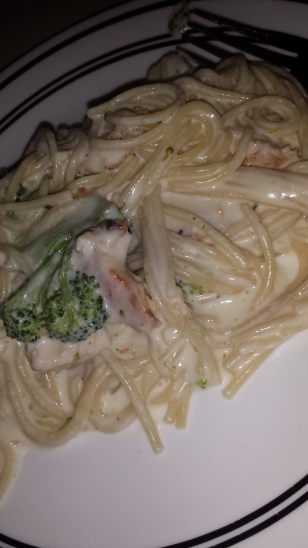
So we decided to switch it up a bit and cook our chicken on the grill. I love that chargrilled taste! I did what I would usually do for this, but I cut the butter and garlic in half, since I wasn’t cooking any meat in it then added the milk mix.

When the Alfredo was ready I cut up the chicken and added it along with some steamed broccoli. It was SO GOOD!!!

My husband turned up the heat a bit by adding crushed red pepper!

20160602_184058.jpg

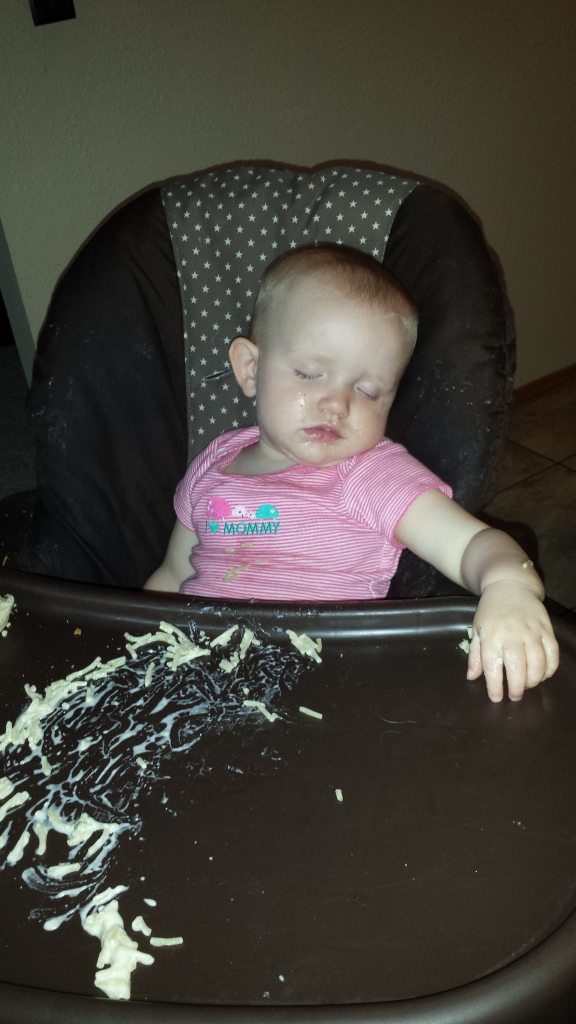
Finally, you will feel like this too…our Little passed out after enjoying her pasta! This is a family favorite!20160602_183824.jpg

$2 DIY Tiered Stand

2 tier cake stand

I love DIY stuff. I love it even more when my completed project costs a fraction of a store bought one. A $2 tiered stand?!? So great!

This 2 tier stand was perfect for my cupcakes and mini Derby Pies for my Kentucky Derby Party.

You’ll need:

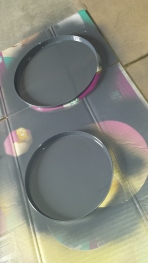
1 set of burner covers from the Dollar Store (they come in a 2 pack, one large & one small)

1 candlestick from the Dollar Store

Spray paint in your color choice (I used an oil-rubbed bronze color)

Super glue or industrial glue

What to do:

Spray paint all of your pieces. make sure to do a couple coats if needed to cover the design if any on the burner covers.

Then glue the pieces together. I decided to flip the candlestick upside down to give more space on the bottom tray. You’ll want to weight it down and give it plenty of time to dry. I tried at first to glue it with hot glue, but that was a bust.


Voila! A 2 tier stand for $2.

stand 22

Also check out my DIY Cake Stand as seen above!

Broccoli & Grape Salad

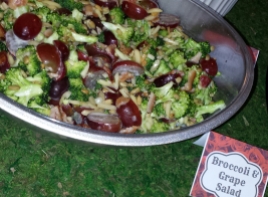
Broccoli & Grape Salad

Broccoli & Grape Salad!! This is a refreshing salad that will be great for all of your summer BBQ’s! I recently made it for my Kentucky Derby Party and it was a delicious hit! Below is the recipe I got from my mama, but there are SO many variations of this on pinterest, like this one. Some add celery, some add onion, but all are the same basic idea.

You’ll need:

1 bunch broccoli florets

2 cups seedless red grapes halved

1 cup slivered almonds

1/2 lb bacon fried crisp and crumbled

3/4 cup sunflower seeds

Optional: 1 cup of raisins

Dressing:

1 cup mayo
1/2 cup sugar
1 tablespoon white vinegar

How to make:

Once you’ve got everything prepped, it’s just 4 easy steps!
1. Mix dressing in a small bowl
2. Mix all other ingredients, except grapes in a large bowl
3. Add dressing and mix
4. Gently fold in grapes

Seriously. It’s that easy. You spend more time halving the grapes than anything else.

Make ahead!

You can made it a day ahead of time too. I don’t mix anything, but just cut up my broccoli and grapes and put in the fridge in separate containers. I also mix up my dressing too. The next day all I have to do is put it all into my serving bowl with the bacon and nuts. Easy Peasy!!

Have you tried this salad? Do you have a different version? Share in the comments!


DIY Tinted Lip Balm!

lip balm before and after

I’m a mom on the go and usually have it together…ok, sometimes have it together.  But even when it’s a leggings and top knot kind of day, as long as I have a swipe of light color on my lips I feel like I have it together.

Lipstick is a no for me right now, so is lipgloss, unless I have nothing else. My usual everyday is my favorite tinted balm in a bright yellow tube! But my BUZZ worthy brand is quite pricy for such a small tube.

I was beyond excited when I saw this pin from Dollar Store Crafts! Make your own tinted lip balm?!?!? I couldn’t wait. Additionally great was that it took about 10 minutes to complete this. From gathering everything to application to my lips!

Here’s what you need:

Tubes Lip Balm/chapstick
Lipstick
A microwaveable glass measuring cup w/ a pouring spout
Toothpick or knife (she says butter knife, I used toothpicks)
Your microwave!

image

image

So for less than the price of one of my favorite sticks, I got a three pack of chapstick! What savings! I used two for my first go and have plans for the third with a more red color. I removed the complete labels from the tubes so my hubby wouldn’t use them and then complain. (Hee hee hee) 

I searched through my bag of make-up I never have time for and found an old tube of MAC lipstick. It was a neutral, but it was quite a bit darker so I thought it would be a good blend.

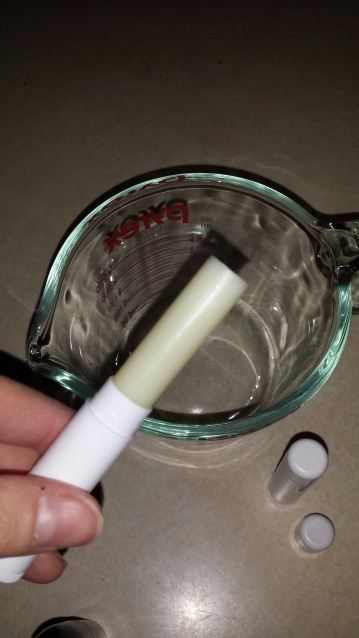
Then you push the chapstick all the way up and out into the microwaveable dish. I just used my fingers to pull it out. Do this with both tubes (if using 2) and then roll the base back to the bottom so they are ready to pour the mix back in.
image

Then add your lipstick choice. The more you add the more color. *NOTE* I thought that my color choice was going to be darker than it turned out to be. You really have to go into a more concentrated color if you really want a more tinted balm. You can always remelt the mix and add more color as needed, but knowing this first, I probably would have chosen a better color.
image

Nuke your mix in 30 second bursts, stirring in between. 30 than 15 was about all that mine needed. Stir it up a bit then pour it into your original tubes.
image
image

Let it sit to cool and harden then swipe on and enjoy!
image


Easy Every Holiday Wreath!

DIY One Wreath


In Bismarck, companies started holding “Pinterest” nights where you get together with friends and do a prepared craft. Super fun,  right?

One night we were doing wreaths. I love this because I ended up combining a couple pins into a wreath I can use year round. The best part is that my son and I do it together. We with make or buy the decor to go on our wreath. We’ve even gotten Hubby’s expertise involved!  Check it out!

St. Patrick’s Day

image

This is my St. Patrick’s day wreath. Felt hearts held together with beautiful nail heads and an origami bow!
For the base wreath, I started with a green foam floral circle you can pick up at any craft store but I’ve seen them at Walmart and Target too. Then pick a neutral ribbon to tightly wrap around it. This one is a canvas ribbon. I think it’s better not to use ribbon with wire and definitely use something wide.

image

Just wrap around tightly and secure with pins. Easy peasy. You’ll want to wrap at a bit of an angle to keep it flat.
After that,  it’s a free for all!  I’ve gone from a wreath once or twice a year to all the time with a quick switch of decor.
This one we simply cut out small heart shapes from green felt and grouped them into fours and held it together with a nail head to make out four leaf clovers.

image

image

The origami bow was a pin I found from How About Orange, complete with instructions. My husband loves to do origami so I knew this would be an easy request. After a practice bow I got this perfect finished product and pinned it on. I had him make me one for Easter,  since it’s right around the corner,  and 4th of July since I was on a roll!
The possibilities are endless. We’ve cut shapes from felt,  bought the foam cutouts from the store. Last easter we added eggs from Joann’s that Danny and I found. Sometimes I do a ribbon bow or no bow! You can also check out The Crafty Mummy for a great felt flower tutorial!
Today we found rabbit cutouts in the Target dollar section so we are ready to make our next holiday wreath! I’ll post more as we decorate for the holidays and seasons!

image

Easter

*UPDATE*
Here is our Easter wreath! My son was so proud of his creation.
image

image

Birthday

This I created for my daughter’s birthday, her Purple Princess Party. Full instructions for the wreath HERE.

20160421_150248.jpg

Derby Party

For my Kentucky Derby Party, this wreath adorned our door:

Derby Wreath DIY

4th of July

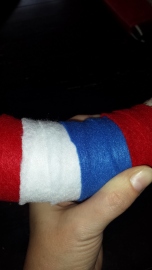
The 4th of July is headed our way, so we took advantage of the roses on the Derby wreath and carried it over on our red, white, & blue wreath!

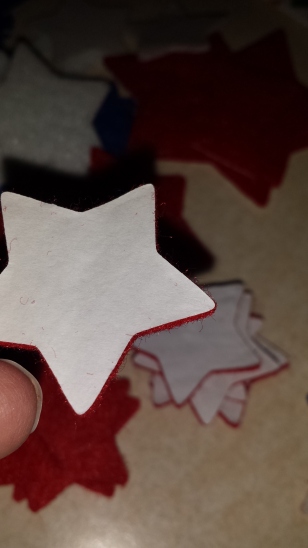
Felt cut into strips (held on with straight pins) and felt star stickers is all you need for this patriotic wreath.

Honey Mustard Dipping Sauce


Honey Mustard Sauce final

Ham on biscuits. This is one of my main go to lunches. Hubby is hungry,  I don’t really feel like cooking,  so voila! Lunch!

But my ham and biscuits took a turn toward amazing when I came across a post by South Your Mouth.

She calls it a Honey Butter Dipping Sauce, but whatever the name,  you can just call it scrumptious!  Plus,  it’s easy to make with just 3 ingredients:

3 tablespoons Honey
3 tablespoons softened butter
3 tablespoons yellow mustard

image

I usually add the butter to a bowl and microwave for about 20 seconds then add the honey and mustard.

image

I then whisk it all together and do a quick pop in the microwave again if it’s not quite smooth. I like to put it in the fridge until the biscuits are ready. The sauce thickens and there is just something I like about a warm sandwich dipped in cold sauce.

image

For my ham and biscuits,  I “pop” open a can of Grands Biscuits and peel apart from the center to make 2 halves. Then add your fillings! Pictured is our usual ham and cheddar, but you can do so many variations. Pepper jack, turkey,  pork, you name it! Bbq pork is out of this world with this dipping sauce!!

image

Bake at 350° for about 12-15 minutes or until golden brown.
Dip. Bite. Repeat.
Dip. Bite. Repeat.
Dip. Bite. Repeat.

image

image

Also check out:

Pork and Ham Sandwiches

Honey Butter Pork

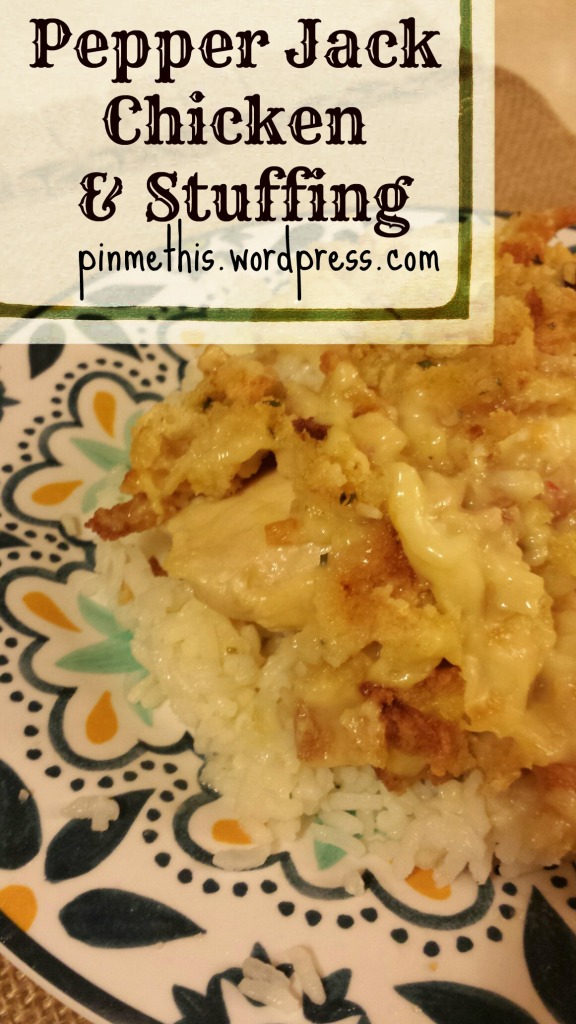
Pepper Jack Chicken Stuffing

Pepper Jack Chicken Stuffing final

Every time I make this I always think about the movie Steel Magnolias. Annelle wants to make something that “freezes beautifully.” While I think she had something else in mind,  this is my beautiful.
Not only is this delightful and fulfilling like comfort food,  but it freezes beautifully!  I usually make two at a time,  one for dinner and one to freeze.
Plus,  it fits all my other requirements like,  easy and fast. It’s a win win.
I found this pin from Or So She Says for the Swiss Cheese Chicken. (Click there for their recipe) below is my variation that we really enjoy. Did I say this was easy?

image

All you need: (just double for 2)
1lb chicken breast
1 can Cream of chicken soup
1/4 cup milk
Stove Top Stuffing of choice (one box is enough for two since you only use half)
1/4 cup of butter
Pepper Jack cheese slices, the original uses swiss cheese slices (both are yummy)

I spray both my freezer pan and glass dish with cooking spray first. Then put my chicken down.

image

Next you want to layer the cheese slices on the chicken.  Four slices work for me in my 8×8 pan,  but I sometimes add one or two more.

image

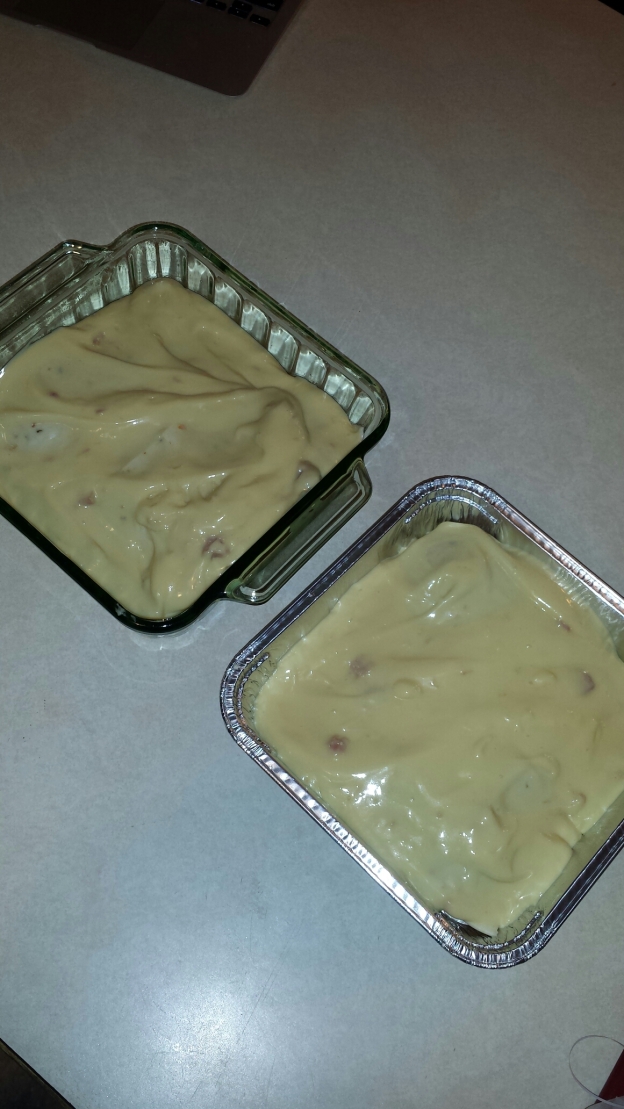
Now you want to combine the milk and can of Cream of Chicken.  I do one at a time just to make it easier. Combine one,  add it on top of the cheese,  combine one and to the other. It looks like yummy cake batter pouring out over the cheese. Just spread it around to fully cover the pan.

image

image

image

Here is where you split. If making two, cover your dish you’re freezing,  label, and add directions of how to finish.

image

To the other you now add half of a package of stuffing and then pour 1/4 cup melted butter on that. Pop it into the oven for 45-60 minutes at 350°.

image

I usually let it cook for the full hour.
Serve it over rice and voila, wonderful dinner that you made 2 of, in about 10 minutes of prep time!
I have also made this with a small bag of frozen broccoli under the cream of chicken mix. It’s a good way to get your veggies in!

image

image

Teriyaki Chicken

Teriyaki Chicken Final

Anyone who knows me is fully aware of my addiction to Mexican and Chinese/Japanese food.  Thus, it is my passion to find recipes that will satisfy my thirst for these foods with out having to go out to eat.  While my Mexican Stuffed Shells (and soon to post enchiladas) fit the bill for my Mexican food fix, I had yet to find something for the latter. Enter teriyaki chicken!! I had tried several different recipes before, none worth posting about. They always lacked that certain something. I believe it’s all about the sauce and this sauce is unbelievable. I guess the recipe in total is mine, however, the teriyaki sauce is from Food.com.

Ingredients:

1lb chicken (I buy the lean thin cut chicken as a time saver)

Soy Sauce

Rice (white or brown, I used white rice)

Sauce:

1/4 cup soy sauce
1 cup water
1/2 teaspoon ground ginger (didn’t have it this time but was still delish)
1/4 teaspoon garlic powder
5 tablespoons packed brown sugar
1 -2 tablespoon honey
2 tablespoons cornstarch
1/4 cup cold water

1. Start the sauce and get it simmering over a low heat. Mix all but cornstarch and 1/4c water in a sauce pan and begin heating. Mix cornstarch and cold water in a bowl and dissolve. Add to sauce in pan. I like to bring it to a boil first then let it simmer on low while I prepare the rest of the meal. Stir occasionally as you cook the chicken.

DSC02461 DSC02441

2.  Cut up the chicken into bite size pieces.

DSC02443


3. Cook the chicken in a little bit of soy sauce.

DSC02445 DSC02446

4. Remove the sauce from heat and let stand. It will thicken. This is when I prepare the minute rice, because why not make it as easy as possible? One cup of rice, one cup of boiling water, let stand and voila! 2 servings of rice.

5. Add rice to plate.

DSC02449


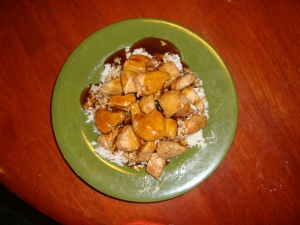
6. Add chicken to rice.

DSC02452 DSC02457


7. Top with your sauce and enjoy! I won’t be ordering take out as long as I can make this goodie!

DSC02459 DSC02460