Teacher Appreciation Gift

Teacher appreciation gift

Having both parents as teachers and several family members that are teachers, I know first hand that teaching is hard. No matter if it’s a 2 day a week preschool or a full time high school teacher, they work hard to help our kids grow. So on the last day of school, why not shower them with some love and show our thanks?

You don’t need to spend lots of money. Most teachers really do believe that it’s the thought that counts. I like to do something more homemade to show I put thought into their gift. Plus it’s fun to get the kids involved in making a “thank you” gift for their teacher.

As always, I searched through Pinterest for some ideas. There are so many great ideas! One that I loved had a card that said, “Thank you for helping me grow”. That was perfect. It really fit. You can find the post from Three Kids and a Fish HERE.

Here’s what I did.

You’ll need:

Clay pot

Flower

Spray paint

Stick on Glitter Letters

Ruler

Optional – Gift card

Here’s what to do:

First you want to spray paint your pots. I LOVE LOVE LOVE chalky paint. If you haven’t tried it, you need to. It is amazing coverage and results! I chose an ivory color.

Then you stick on your letters. First we were just going to stick random letters all around the pot. But then my son decided that we needed to put her name on it so she would know it was for her. (ahh, I just love him!)

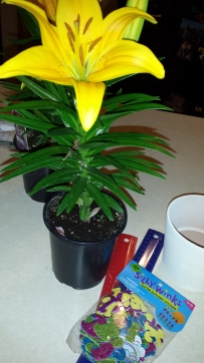
Once we got our letters on, we eased out the beautiful lily from it’s plastic pot and added it to our clay pot. I’m a bit of a neat freak, so I always line the pots with a coffee filter so the soil doesn’t come out of the drainage hole when you water it. 20160525_230823.jpg

I bought these rulers because they had a hole at the top, perfect for attaching my note. But they are a flexible plastic and it made it harder to get them to stand upright (you’ll see further down).

20160525_231528.jpg

I created my own “thank you” tag. Below is a blank one you can print. To get the size I used, I printed 6 to a page. I also added a Starbucks gift card to the back.

Help me grow

I attached the tags with a little ribbon and poked the rulers into the soil.

Here they are! I think they are so cute! What do you do for teacher gifts? Also check out our Lollypop bouquets! Easy to make and are sweet!

20160525_232344.jpg

pinmethis.com

Lollypop Bouquets final

Favorite Pinterest Finds

3 favorite finds

Don’t you love when you find something great on Pinterest and then can find or make it in real life? Me too! These are a few of my favorites that I found on Pinterest that led me to things that made life easier and WAY better.

Travel Bag

First up is a travel bag. I used to have this great weekender bag that I LOVED. Then in some freak accident my husband destroyed it. After much sadness, I let it go and started the search for another. Pinterest is a great place for window shopping. Pictures of items from all over are right there in your search bar. All of my favorites were these beautiful canvas and leather bags that were $150+ or just not available.

Once I knew what style I wanted, there started a more specific search. This lead me to my awesome neighbor that sells Thirty-One! They have the cutest weekender bag, with the fold-over top, and you can monogram it!!

Then I found a cinch bag, that matches, to use as my everyday grab and go diaper bag and also, a toiletry bag, that matches, that I can easily pack in my weekender or hook onto the strap. ALL MATCHING! Love!

Travel bags 1

The weekender is so large. I can fit all of my stuff for a long weekend and the stuff for my 2 kids (1&3 year old) in this bag. For a week trip, I fit my stuff and my 1 year olds easily. It has a shoulder/cross-body strap as well as generous shoulder handles. I hosted a party when it was on special, got if for less than half the list price. The cinch bag was $20 and cool enough my hubby doesn’t mind carrying it. Talk to your local consultant or I will direct you to mine. You won’t be sorry.

Reusable Food Pouch

My kids love squeeze pouches. They would eat all of their food with them if I’d let them. They can be expensive though! Store brands might be $.88-$.99, but others are upwards of $1.50. Ummm, no.

The last straw was all the contamination reports and recalls for these pouches. With our baby girl a little older now, I could make the time to make my own pouches. Then I could be confident letting them suck down their dinner, and sneak in veggies.

There are endless versions of these. The Sweeter Side of Mommyhood shared these and what she did:

Food storage.jpg

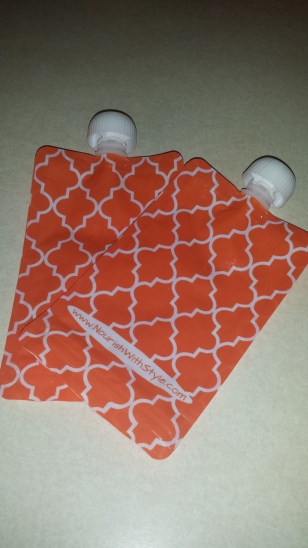
I found the following and have loved them. They are from Nourishwithstyle.com, although I got a great deal on mine through Zulily. They are dishwasher safe, but I usually just hand wash them with a bottle brush and let them air dry. They have a zip lock bottom, where you fill from, and twist off lids.

I even added a special plastic container to the fridge where these are stored for easy kid access.I’ve found that they are best stored on their side. They paid for themselves in one use. ONE! We have used them over and over and they look great.


Baggy Holder

Last, but not least, I found this great little kitchen gadget, a Baggy Holder Storage Rack. I know you are probably thinking this one is silly. I did too until I used it.

If you make frozen dinners, meal prep, you NEED this in your kitchen. Maybe even two.

It snuggly holds your zip lock bags open so you can easily add all your prepped food for freezing. It’s also great for leftovers that you are adding to a bag.  This also works if you are reusing the plastic bags. Just wast them out and set them upside down on the arms to dry.

This folds super flat, maybe only an inch tall, and is adjustable for different sizes of zip lock bags. You can find them at Bed Bath & Beyond, but I got mine on a great deal from Zulily .

Have you found any great or even life changing things on Pinterest? Please share!

$2 DIY Tiered Stand

2 tier cake stand

I love DIY stuff. I love it even more when my completed project costs a fraction of a store bought one. A $2 tiered stand?!? So great!

This 2 tier stand was perfect for my cupcakes and mini Derby Pies for my Kentucky Derby Party.

You’ll need:

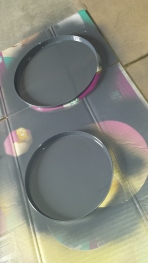
1 set of burner covers from the Dollar Store (they come in a 2 pack, one large & one small)

1 candlestick from the Dollar Store

Spray paint in your color choice (I used an oil-rubbed bronze color)

Super glue or industrial glue

What to do:

Spray paint all of your pieces. make sure to do a couple coats if needed to cover the design if any on the burner covers.

Then glue the pieces together. I decided to flip the candlestick upside down to give more space on the bottom tray. You’ll want to weight it down and give it plenty of time to dry. I tried at first to glue it with hot glue, but that was a bust.


Voila! A 2 tier stand for $2.

stand 22

Also check out my DIY Cake Stand as seen above!

Jello Parfaits

Jello Parfaits

I love parfaits! I found this PIN from Kraft where they cooled the Jello at a slant and added cool whip. I thought this would be such a creative addition to my Kentucky Derby party and something that the kids would really like.

It was a hit with adults and kids alike! I sliced up some strawberries as a garnish to top it off.

You’ll need:

Jello of choice

dish/glass for your jello (I used plastic cups)

Cool Whip

Fruit if preferred

What to do:

20160506_104424.jpg

I chose strawberry Jello and I found these plastic wine glasses at the Dollar Store that came 6 to a pack. It was a perfect single serving size. Also once the Jello was made per the instructions on the box, it filled 8 of these cups evenly without any leftover.

I had this wood U shape “box” that was a project reject but found new purpose as my glass holder. A little washi tape on the ends worked as a seatbelt to hold the glasses at an angle .

Slowly I poured the liquid Jello into the glasses. Then, with steady ninja like moves, I transferred my glasses to the fridge to set.

20160506_110810.jpg

Jello in the fridge ready to set!

After your Jello is set, pipe in some Cool Whip and garnish. It was so cute. Next time I’ll add slices of strawberries to the liquid Jello.

I also found the version below from Lea’s Cooking that I’m eager to try for the 4th of July! She has a full step-by-step tutorial on how to make this festive treat!4th jello from Lea's Cooking


Broccoli & Grape Salad

Broccoli & Grape Salad

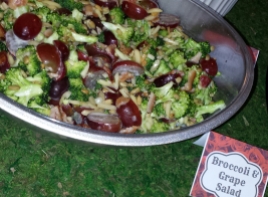
Broccoli & Grape Salad!! This is a refreshing salad that will be great for all of your summer BBQ’s! I recently made it for my Kentucky Derby Party and it was a delicious hit! Below is the recipe I got from my mama, but there are SO many variations of this on pinterest, like this one. Some add celery, some add onion, but all are the same basic idea.

You’ll need:

1 bunch broccoli florets

2 cups seedless red grapes halved

1 cup slivered almonds

1/2 lb bacon fried crisp and crumbled

3/4 cup sunflower seeds

Optional: 1 cup of raisins

Dressing:

1 cup mayo
1/2 cup sugar
1 tablespoon white vinegar

How to make:

Once you’ve got everything prepped, it’s just 4 easy steps!
1. Mix dressing in a small bowl
2. Mix all other ingredients, except grapes in a large bowl
3. Add dressing and mix
4. Gently fold in grapes

Seriously. It’s that easy. You spend more time halving the grapes than anything else.

Make ahead!

You can made it a day ahead of time too. I don’t mix anything, but just cut up my broccoli and grapes and put in the fridge in separate containers. I also mix up my dressing too. The next day all I have to do is put it all into my serving bowl with the bacon and nuts. Easy Peasy!!

Have you tried this salad? Do you have a different version? Share in the comments!


Baby Nursery: Gray & White

Gray & White Nursery

Our second baby we decided to not find out what we were having. We knew healthy baby, and that was all that mattered.

Planning a baby room not knowing the baby’s sex though, can be quite the challenge. I’m recently in love with everything gray and white. So I decided on this for the baby’s room. It’s a great neutral combo that allows you to easily add pops of color. If we had a boy I would add kelly green accents and if we had a girl I would add coral accents.

It was a girl!

I made all of my own art and decor for her room. I want to add a bit more, but right now it’s just too cute.


Inexpensive dresser/changing table or maybe a recycled one? A quick and easy upgrade is to simply switch out the knobs. We found the dresser (and the crib) on Amazon and I found these beautiful knobs at Hobby Lobby. You could also choose something with the accent color of the room or of the theme. No one said you HAD to keep the ones the furniture came with!

20160510_202451.jpg

I made the canvas above her crib by simply adding letter stickers to the canvas, painting over in my primary color of gray, then peeling the letters off. I plan to paint the “HAPPY” in coral.

To help with the accent color I ordered this cute pillow from Bed Buggs Boutique on Etsy.

20160510_202503.jpg

Chair & Ottoman from Pottery Barn Kids, Pillow from Bed Buggs Boutique

Easily upgrade any glass or mason jar to a stunning addition to your room. Follow my DIY direction on Glass to Gorgeous.

Name sign:

I love arrows and love even more when they are incorporated into words. I just had to make one with her name. I used my chalk transfer method (you can get a full step-by-step HERE) to easily transfer my design to a chalky paint painted piece of wood in my desired shade of gray. Then filled it in with a liquid chalk pen.

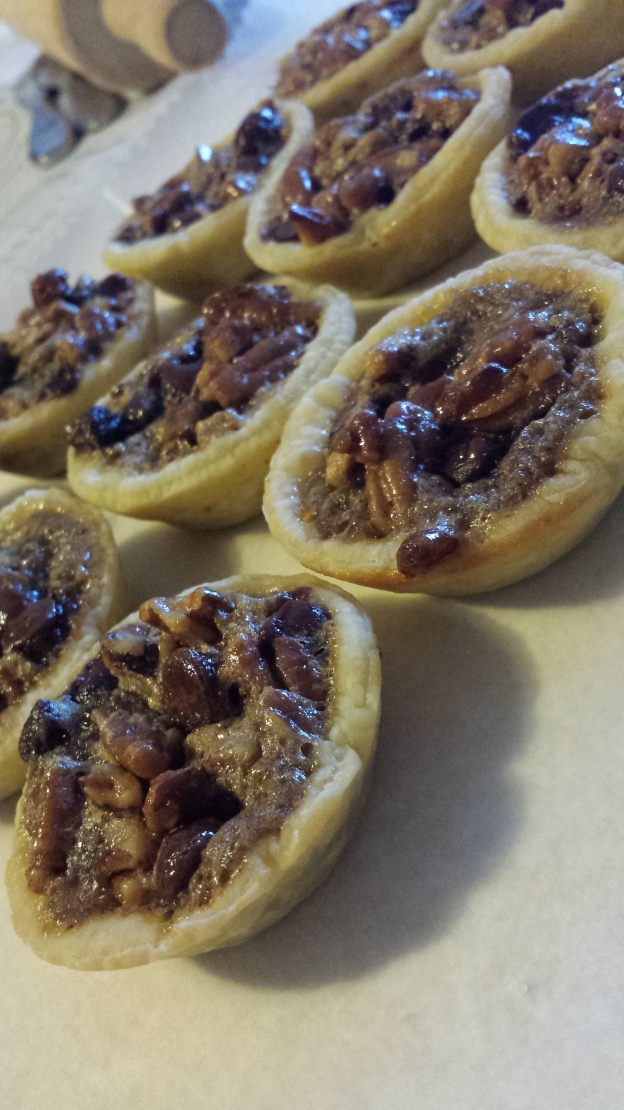
Easy Derby Pies

Mini Derby Pies

This is by far one of my favorite things…and parts of Derby time. DERBY PIE! We have been making this pie for years & I honestly have no idea where I found the recipe. If I do find out I’ll share it! But just know, you can’t have just one piece.

Crust:

1/2 cup (1 stick) butter, cut into small pieces

1 1/4 all-purpose flour

1 tablespoon sugar

1/2 teaspoon salt

3-4 tablespoons water

Mix flour butter sugar salt until coarse with a few small clumps of butter remain.

Add 2 tablespoons of water, mix until it holds together, adding a little water at a time as necessary. You want it to hold together but still be crumbly.

Shape into a disk and wrap tightly in plastic wrap until firm, about 1 hour up to 3 days.

Filling:

*This makes quite a bit*

Ingredients:

1/2 cup butter, melted

1/4 cup white sugar

3/4 cup brown sugar, packed

3/4 cup Karo light corn syrup

4 large eggs

1 1/2 teaspoons vanilla

3/4 cup chocolate chips

1 1/4 cup chopped pecans

*Optional is a 1/4 cup bourbon. We don’t make it with bourbon and it is fantastic.

Here we go:

Preheat your oven to 350 degrees. Then you want to roll out your dough.

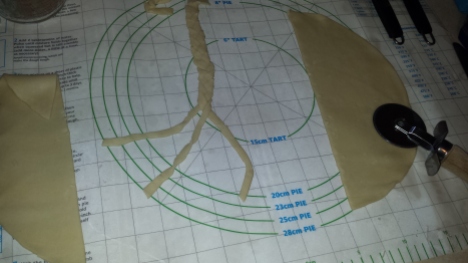
This time we decided to make mini pies as well as a full size. For the full 10 inch dish, roll it out larger than the dish and use you fingers to pinch of the top around the edges. I used a little extra dough this year and made a braid that I added to the top before baking.

For the minis I highly suggest Demarle cookware! I cut out small rounds of dough and lightly placed onto the muffin cups. When these were done cooking they easily POPPED out of the molds! It’s the best bake ware I’ve used. You barely even have to wash the stuff it cooks so cleanly and perfectly!

Alright…off my soapbox…

So once you have your dough in place, in a large mixing bowl, whisk butter, sugars, corn syrup, eggs, vanilla, and bourbon (if your using it) until frothy.

Fold in chocolate chips and pecans. Mix.

Pour into your pie crust, or spoon into your mini crusts. Cook at 350 for 50-60 minutes (full size) 25-30 for the minis, or until it is set, meaning not jiggly.

Slice and serve with some cool whip or ice cream. SO GOOD!!!

20160506_182739.jpg20160506_185200.jpg

DIY Derby Trophy CenterpieceWindow Glass ArtDerby Wreath DIYMaking a Hat 1Derby printables and coloring pagesDerby Hat TutorialDerby party cover

DIY Derby Trophy Decor


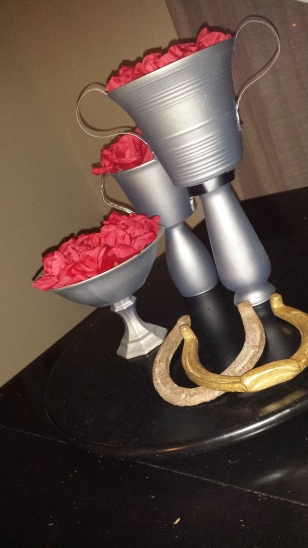
DIY Derby Trophy Centerpiece

So if you are looking for a last minute centerpiece, look no further than your local dollar store! All you need are a few items to make your very own Kentucky Derby Trophies! Easy and cheap DIY trophy centerpieces!

You’ll need:

Dollar store items:

Candlesticks, bowl, vase, gardening pots (plastic or ceramic), a glass

Other items:

Spray paint

Hot glue gun and glue

Optional: Pipe clamps (got these in the plumbing section of a home improvement store)

Here’s how:

While you are at the dollar store, stack the items you find until you find one that is pleasing and looks balanced. You don’t want it to topple over at the first bump of the table. Also think about height. Are you doing a grouping? Vary the sizes and styles. Here are my combos:

  1. The tallest is a plastic gardening pot with a tall vase (upside down) as the base. This one also has the pipe clamps I molded to make handles.
  2. The middle size is a ceramic pot with a drinking glass as the base. This one was a trial as far as the handles go. I used pipe cleaners wrapped in washi tape and then spray painted and glued on.
  3. The shortest is a ceramic bowl on a candlestick.

Once I figured out my combos I started my spray painting. I painted first because I hadn’t quite figured out how I was going to add handles or if at all. However, doing this allowed me to get the perfect color with multiple coats.

I got my first coats finished and then hot glued the parts together. This is where I would suggest taking your time. Keep the glue lines smooth and even so you can paint over them. I had most trouble adding the handles but was able to add some layers of glue to smooth out the look and even trim up any drips with scissors after it was dry.

Spray paint again. I used several paints, seen below. I just lightly dusted the trophies again paying special attention to cover the glued areas. Mix and mix until you find a color you like. I wanted a vintage tarnished silver look.

20160502_233959.jpg

Layer. Layer. Spray again…and again.

Last but not least I added roses to the centers. Bouquets and foam circles & squares from the dollar store of course.

20160502_234939.jpg

So for about $10 I made 3 “Trophies” for my table. Then, I found a white ceramic “trophy” complete with gold roses from a local consignment shop! What a find! Follow my blog for final pictures of my party. I can’t wait to put it all together!

Here are a few more links to make your Derby party a WINNER!

Derby party coverEtiquette and StyleMaking a HatDerby Hat TutorialDerby printables and coloring pagesDerby Wreath DIYWindow Glass Art

Easy Window Glass Art

Window Glass Art

I’m sure by now you assume I have oodles of time to sit around and craft but the reality is I do most of my stuff after the kids have gone to bed and hubby has fallen asleep on the couch. What’s a girl to do?

This next one came to me while I was working on said crafts one night at the kitchen table. I was looking at my sliding glass door that my son and I had colored on earlier that day.

Why couldn’t the windows be part of my decor for parties, namely my Kentucky Derby Party?

20160429_203058.jpg

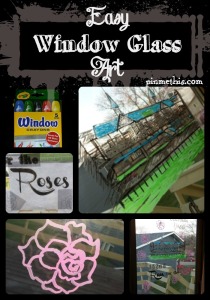
I printed up some wording that I created and also enlarged a picture of the Twin Spires at Churchill Downs. Oh, and some roses too. I taped them to the opposite side of the door and traced away using the Crayola crayons made for use on the windows.

20160429_203223.jpg

20160429_202948.jpg

So what do you think of my window art? Have you used these crayons?

20160429_203106.jpg

Derby Hats 101: Tutorial

Derby Hat Tutorial

It seems that my previous post about making a hat was popular, but it was lacking a step-by-step tutorial. So I thought I’d share how I made this years hat.

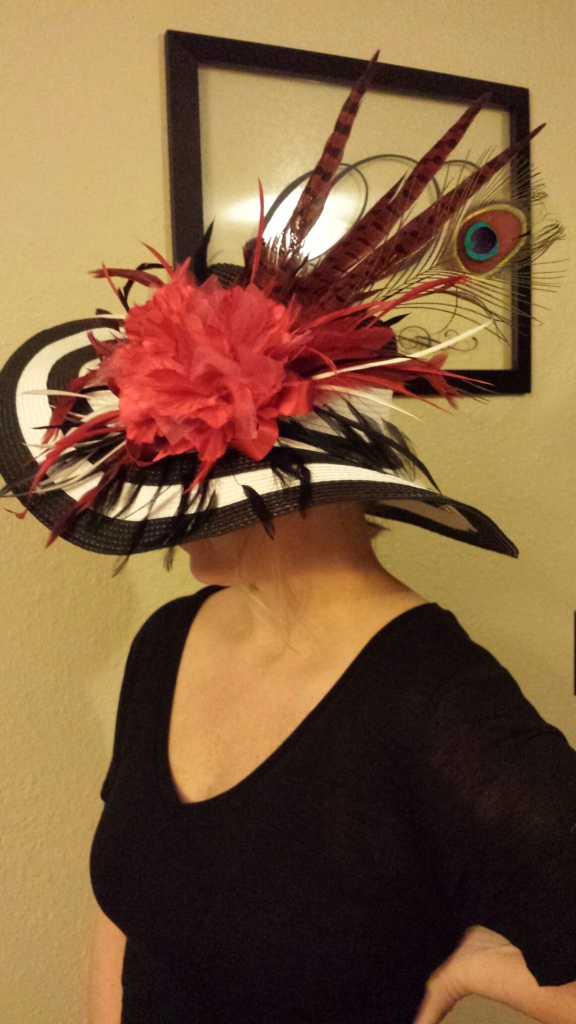
You can easily make a hat that looks like you spent a fortune or had it made. This year I found my hat at Target! $14.99 for a cute black and white stripe hat. It fit well and had a good shape.

I then went to Hobby Lobby, 40% discount coupon in hand, and wandered the store.Go with an open mind. You never know where you will find inspiration. I honestly went thinking I wanted to do big flowers. Then I found feathers. RED feathers. I gathered some that went together, knowing that if I needed more I could always go back. Since I already had red ribbon at home, as well as hot glue, thread, and extra decor, the total I spent at Hobby Lobby was no more than $10.

$24.99 for a Derby hat? You can’t get those prices at Kroger! I know for sure; My aunt sent me this picture while she was shopping:

IMG_07931

pinmethis.com

The Fit

First get comfy in front of a mirror and position and reposition your hat to find the most flattering style. If it has a wire brim you can play with the curves of the brim. I love the dip over one eye. Some prefer to have it sit back away from their face.

If your hat is a solid style with out a noticeable front or back, although they usually do, rotate your hat around to see if one side fits better. Once you’ve decided, if the front you are using is different from the true front you might mark it with a safety-pin. So you remember where you plan to put your decoration.

Styling Step-By-Step

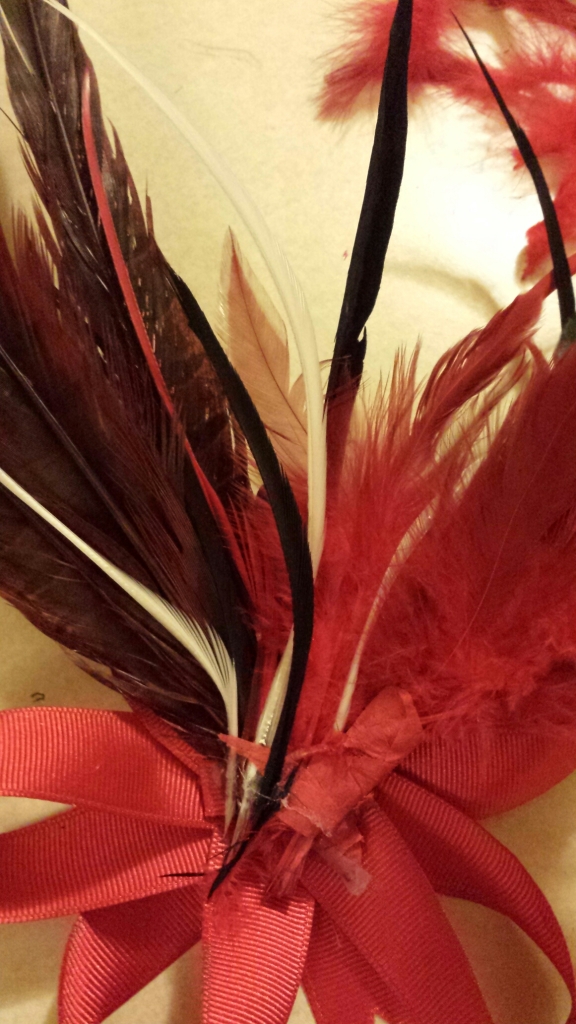
I have the black and white stripe hat, a few large bunches of red feathers, several small bunches of black and white feathers, red ribbon, and a peacock feather that has also been dyed red.

**If you are making a fascinator, all of the same methods apply,however, you may want to use smaller feathers. If you are using a headband, cut two circles from felt and hot glue two sides so you can slide the headband through the circle, one felt piece on top to hold your decoration and one on the bottom that sits against your hair.

20160421_204135.jpg

image

I also have at the ready, a hot glue gun, needle and thread, tape, and scissors.

Also, find something you can set your hat on as a stand so you can really work on it with the brim as you need it. I used an upside down clay pot that is in the process of being made into a cake stand.

20160422_235847

OK, this is the fun part. Just remember that you can always redo, change, alter, or even start over. There is no right or wrong way to do this. Just let the creativity flow.

If you want to put a band of ribbon around the crown do this first. You can tack it on with thread if you plan to remove it or hot glue it for a permanent solution. I like to pin/safety-pin it to the hat to hold it in place as I go. After much debate, I decided to do without this year.
image

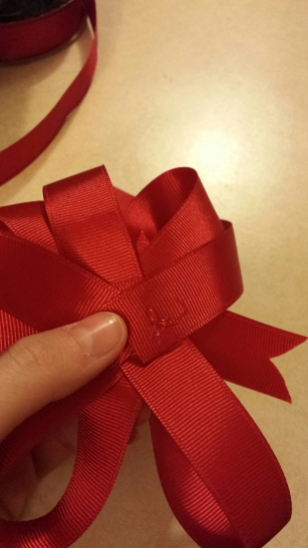
However, I decided that I wanted to make my decoration removable because I liked the hat so much. Super great for a summer hat! If you are going to do this you can follow what I did and make a ribbon base (see below) for all that you will glue to it or cut a small piece of felt in the same color as your primary decor or hat color.

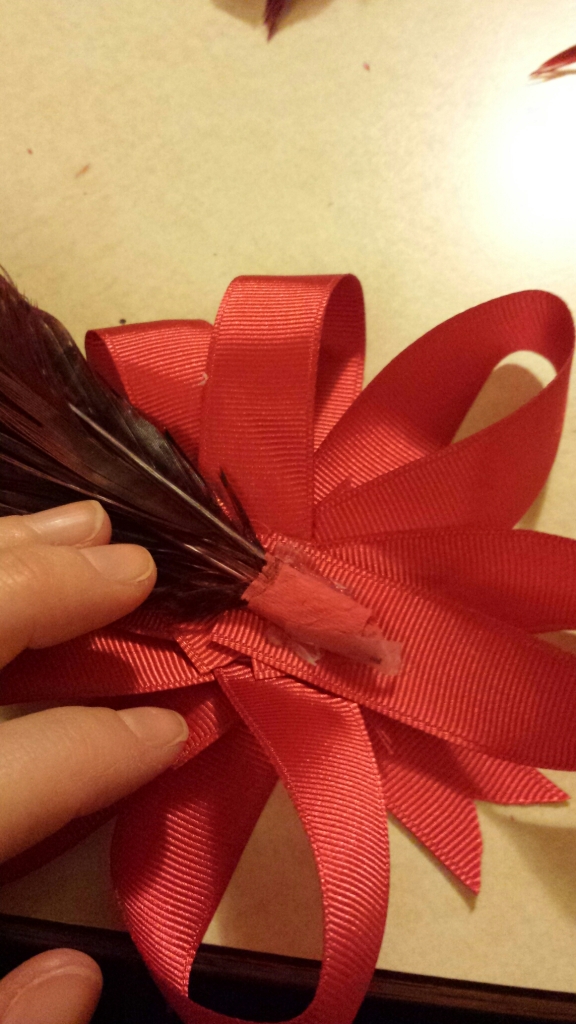
This is my base: I looped my ribbon around a few times and then attached the loops with thread. Once I had that together I used hot glue to attach a few more loops with single strands of ribbon.

Next, I took apart the feathers to separate the long feathers from the short and to remove the long wire stem.

image

Once I decided the angle on my hat I wanted for the long red feathers I hot glued them to my ribbon base. I then attached a few single sprigs of red, white, and black feathers around that with hot glue.
image

image

image

A few times I would group together single strands of feathers and hot glue ribbon around the base to keep them together and to keep my fingers from getting singed…again. I also used the end of a plastic fork to lightly press down on the feathers as the glue dried.
image

image

You want to keep following this process until you are happy with the spray of feathers or flowers. It doesn’t have to be even or symmetrical. My final addition was the peacock feather for my boost of luck!
image

image

I then added the half-moon of black feathers to the bottom of the ribbon so they would rest on the brim of the hat.

feathers
image

I was really liking my finished product, but something about the ribbon just wasn’t sitting well with me. It just needed something more. I think if the ribbon was wider or had pattern I would have liked it more.

So I dug through all my brooches and hair clips and brought several to the table. One worked out to give it the WOW factor. It also had a pin on the back as well as a hair elastic.
image

image

I pinned it on the center of the ribbon and voila! GORGEOUS! How to add the entire decoration to the hat? A safety-pin of course. I just have one holding it in place right now and may add another before May 7th, but it seems secure enough.
image

image

image

image

image


image

image

So what do you think?

It’s Derby y’all!

GO BABY GO!!

Click below for more Kentucky Derby fun:

DIY Derby Trophy Centerpiece

Etiquette and StyleMaking a HatDerby party coverDerby printables and coloring pagesDerby Wreath DIYWindow Glass Art