Sausage with Cajun Alfredo

Sausagewithcajunalfredo

I feel like a genius after having made this dinner. This only came about because I thought I had everything I needed for dinner…until time to make dinner and it turns out I had about half. Half one one recipe and half of another.

My first reaction was panic. I’m not usually the “wing it” cook. But, I knew the two recipes well enough that I thought I could mix it. Of course, when Hubs asked what was for dinner I answered with a  “we’ll see!” Turns out, it was a blessing for our tummies!

So I combined my Sausage Pasta with Tomato Cream Sauce (cajun style) with my Cheesy Garlic Chicken Alfredo.

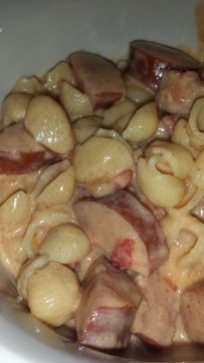
Sausage Cajun Alfredo

You’ll need:


For the Alfredo:
2 cups milk
4 ounces cream cheese (1/2 a block)
2 Tbs flour
½ tsp salt
3 Tbs butter
1 cup grated Mozzarella cheese ( or Cheddar!)20160516_171323.jpg

For the Sausage pasta:
8+ ounces penne pasta (or whatever you prefer, I used small shells)
12 oz smoked sausage or Chicken!
14-oz can petite diced tomatoes with onion, drained well
1 teaspoon garlic powder
1-2 Tablespoons cajun seasoning
Salt and pepper to taste

What to do:

First, I started my pasta cooking and then made the Alfredo just as I do for the regular recipe:

Use a mixer or blender to mix together the milk, flour, salt, and cream cheese until it is smooth. I also added butter to this mix and heated it until it thickens then added the shredded cheese and let it sit.

Then, while those two were going, I sliced up my sausage and sautéed it and then added my tomatoes and onion, garlic and cajun spices, and a little S&P. Mix well

Finally, once my Alfredo was ready I slowly stirred it into my pan of sausage. making sure to coat everything and mix in the cajun spice. Then I added the pasta and mixed again.

This was one of the best outcomes of not having what you need!! This mix may be one of my favorites!

Cheesy Garlic Chicken Alfredo


Cheesygarlicchickenalfredo

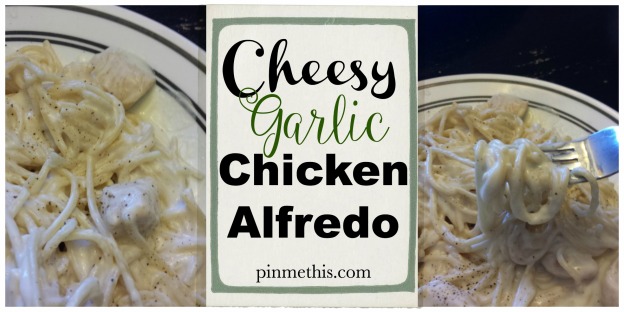
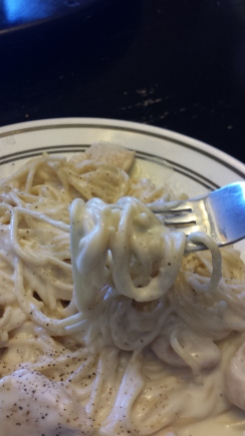
Cheesy Garlic Chicken Alfredo! After one bite the hubby said, “Oh, wow”. Yes, it’s that good. The pin from Eazy Peazy Mealz was for SHRIMP Alfredo. I decided to make this after I shopped, so chicken it was. But this would be oh so good with shrimp!!

The original post also says this is a 30 minute meal. It took me a little longer than that. I think after some practice and with shrimp (shorter cooking time) it will be closer to the 30 min mark. But ABSOLUTELY try this!!

You’ll need:

2 cups milk
4 ounces cream cheese (1/2 a block)
2 Tbs flour
½ tsp salt
3 Tbs butter
3 Tbs minced garlic (I used just shy of a Tbs of garlic powder)
1 cup grated Mozzarella cheese
⅓ cup parmesan cheese (optional)
Pepper to taste
1 lb peeled and deveined shrimp or chicken, cut into small pieces or strips (as I did)

Pasta of choice (I used thin spaghetti)

20160516_171323.jpg

What to do:

Use a mixer or blender to mix together the milk, flour, salt, and cream cheese until it is smooth. Then set it aside.

20160516_172725.jpg

Next, you’ll melt your butter and garlic in a sauce pan then add your shrimp or chicken to cook. Once it’s cooked, set it aside, removing it from the pan and leave the remaining butter and garlic . Cook up your pasta per the box directions.

Next add the milk mixture to the pan you just used to cook the shrimp or chicken. Stir until it comes to a simmer and then continue to stir until it thickens.20160516_175010.jpg

Remove it from the heat and add the mozzarella and parmesan cheeses. Cover and let it sit for about 5 minutes.

20160516_175526.jpg

Yum! Steamy!

Add your shrimp or chicken and let it stand for about another 5 minutes.

My Alfredo was quite thick and super cheesy at this point so I put it back over a medium-ish heat and stirred in a little milk at a time until it thinned out. I served it over thin spaghetti, my hubby’s favorite, and seasoned with a little pepper.

This was so good. Like, you’d order in a restaurant good. Best off all, my lunch leftovers were great!

Update!

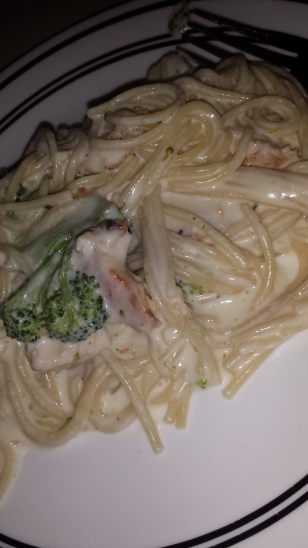
So we decided to switch it up a bit and cook our chicken on the grill. I love that chargrilled taste! I did what I would usually do for this, but I cut the butter and garlic in half, since I wasn’t cooking any meat in it then added the milk mix.

When the Alfredo was ready I cut up the chicken and added it along with some steamed broccoli. It was SO GOOD!!!

My husband turned up the heat a bit by adding crushed red pepper!

20160602_184058.jpg

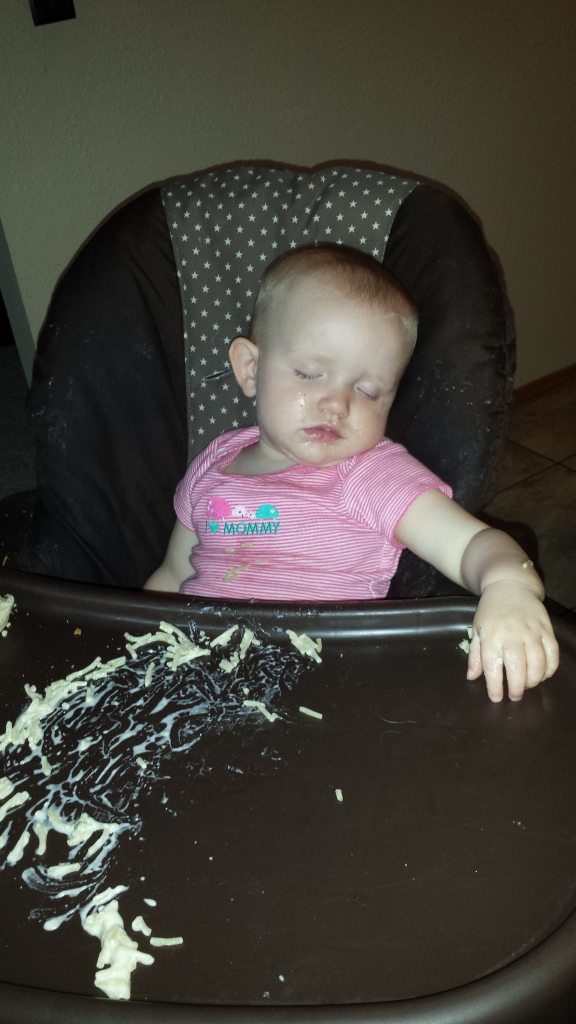
Finally, you will feel like this too…our Little passed out after enjoying her pasta! This is a family favorite!20160602_183824.jpg

Easy Derby Pies

Mini Derby Pies

This is by far one of my favorite things…and parts of Derby time. DERBY PIE! We have been making this pie for years & I honestly have no idea where I found the recipe. If I do find out I’ll share it! But just know, you can’t have just one piece.

Crust:

1/2 cup (1 stick) butter, cut into small pieces

1 1/4 all-purpose flour

1 tablespoon sugar

1/2 teaspoon salt

3-4 tablespoons water

Mix flour butter sugar salt until coarse with a few small clumps of butter remain.

Add 2 tablespoons of water, mix until it holds together, adding a little water at a time as necessary. You want it to hold together but still be crumbly.

Shape into a disk and wrap tightly in plastic wrap until firm, about 1 hour up to 3 days.

Filling:

*This makes quite a bit*

Ingredients:

1/2 cup butter, melted

1/4 cup white sugar

3/4 cup brown sugar, packed

3/4 cup Karo light corn syrup

4 large eggs

1 1/2 teaspoons vanilla

3/4 cup chocolate chips

1 1/4 cup chopped pecans

*Optional is a 1/4 cup bourbon. We don’t make it with bourbon and it is fantastic.

Here we go:

Preheat your oven to 350 degrees. Then you want to roll out your dough.

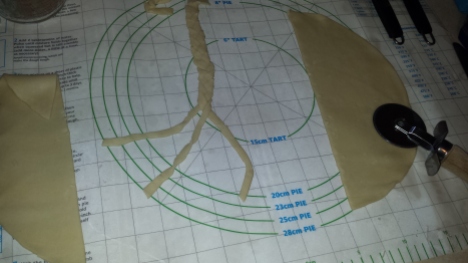
This time we decided to make mini pies as well as a full size. For the full 10 inch dish, roll it out larger than the dish and use you fingers to pinch of the top around the edges. I used a little extra dough this year and made a braid that I added to the top before baking.

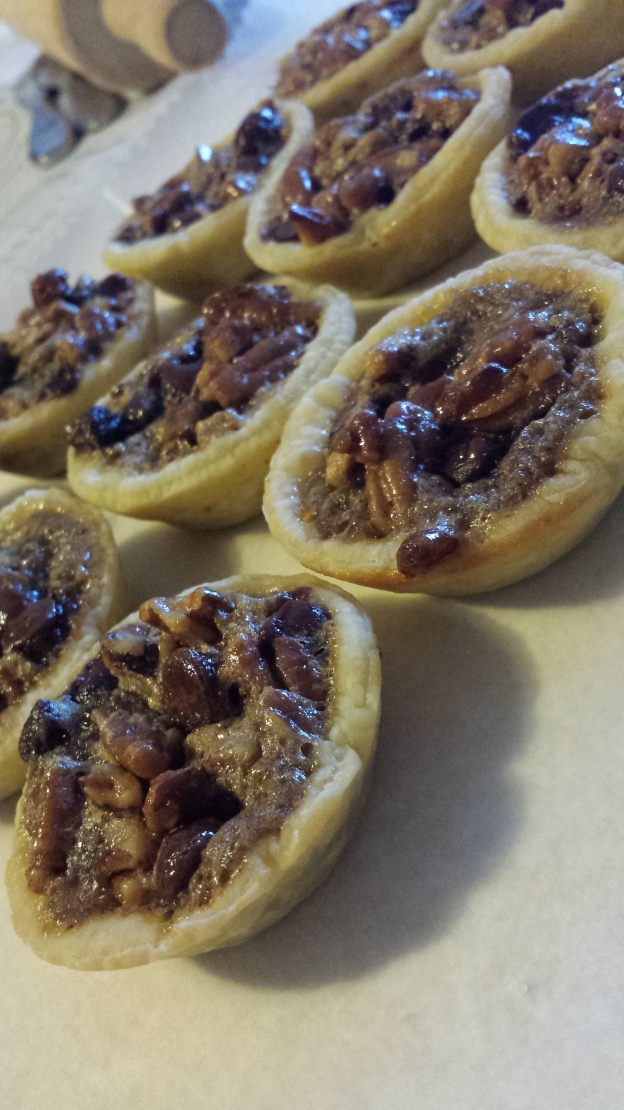
For the minis I highly suggest Demarle cookware! I cut out small rounds of dough and lightly placed onto the muffin cups. When these were done cooking they easily POPPED out of the molds! It’s the best bake ware I’ve used. You barely even have to wash the stuff it cooks so cleanly and perfectly!

Alright…off my soapbox…

So once you have your dough in place, in a large mixing bowl, whisk butter, sugars, corn syrup, eggs, vanilla, and bourbon (if your using it) until frothy.

Fold in chocolate chips and pecans. Mix.

Pour into your pie crust, or spoon into your mini crusts. Cook at 350 for 50-60 minutes (full size) 25-30 for the minis, or until it is set, meaning not jiggly.

Slice and serve with some cool whip or ice cream. SO GOOD!!!

20160506_182739.jpg20160506_185200.jpg

DIY Derby Trophy CenterpieceWindow Glass ArtDerby Wreath DIYMaking a Hat 1Derby printables and coloring pagesDerby Hat TutorialDerby party cover

Honey Mustard Dipping Sauce


Honey Mustard Sauce final

Ham on biscuits. This is one of my main go to lunches. Hubby is hungry,  I don’t really feel like cooking,  so voila! Lunch!

But my ham and biscuits took a turn toward amazing when I came across a post by South Your Mouth.

She calls it a Honey Butter Dipping Sauce, but whatever the name,  you can just call it scrumptious!  Plus,  it’s easy to make with just 3 ingredients:

3 tablespoons Honey
3 tablespoons softened butter
3 tablespoons yellow mustard

image

I usually add the butter to a bowl and microwave for about 20 seconds then add the honey and mustard.

image

I then whisk it all together and do a quick pop in the microwave again if it’s not quite smooth. I like to put it in the fridge until the biscuits are ready. The sauce thickens and there is just something I like about a warm sandwich dipped in cold sauce.

image

For my ham and biscuits,  I “pop” open a can of Grands Biscuits and peel apart from the center to make 2 halves. Then add your fillings! Pictured is our usual ham and cheddar, but you can do so many variations. Pepper jack, turkey,  pork, you name it! Bbq pork is out of this world with this dipping sauce!!

image

Bake at 350° for about 12-15 minutes or until golden brown.
Dip. Bite. Repeat.
Dip. Bite. Repeat.
Dip. Bite. Repeat.

image

image

Also check out:

Pork and Ham Sandwiches

Honey Butter Pork

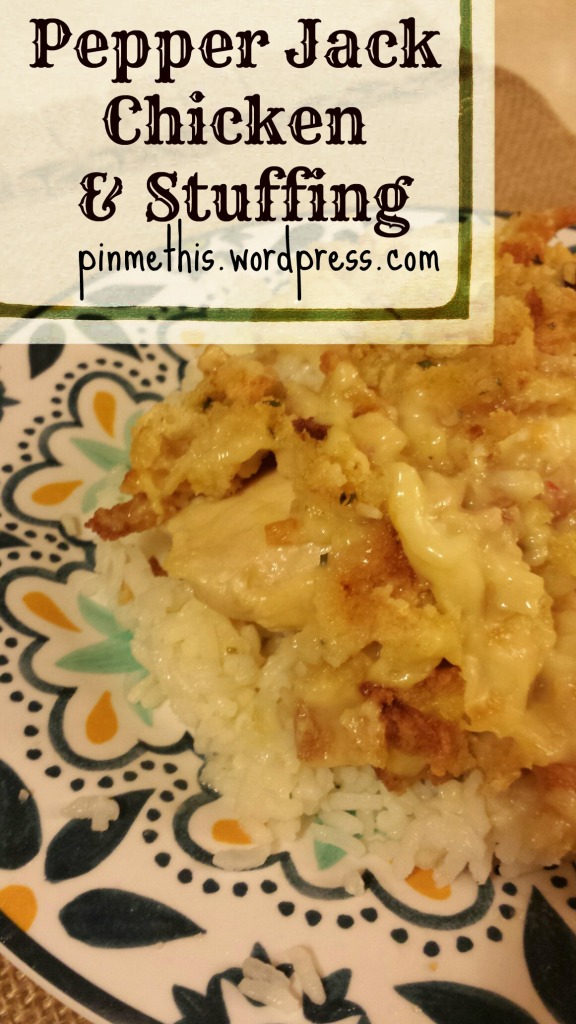
Pepper Jack Chicken Stuffing

Pepper Jack Chicken Stuffing final

Every time I make this I always think about the movie Steel Magnolias. Annelle wants to make something that “freezes beautifully.” While I think she had something else in mind,  this is my beautiful.
Not only is this delightful and fulfilling like comfort food,  but it freezes beautifully!  I usually make two at a time,  one for dinner and one to freeze.
Plus,  it fits all my other requirements like,  easy and fast. It’s a win win.
I found this pin from Or So She Says for the Swiss Cheese Chicken. (Click there for their recipe) below is my variation that we really enjoy. Did I say this was easy?

image

All you need: (just double for 2)
1lb chicken breast
1 can Cream of chicken soup
1/4 cup milk
Stove Top Stuffing of choice (one box is enough for two since you only use half)
1/4 cup of butter
Pepper Jack cheese slices, the original uses swiss cheese slices (both are yummy)

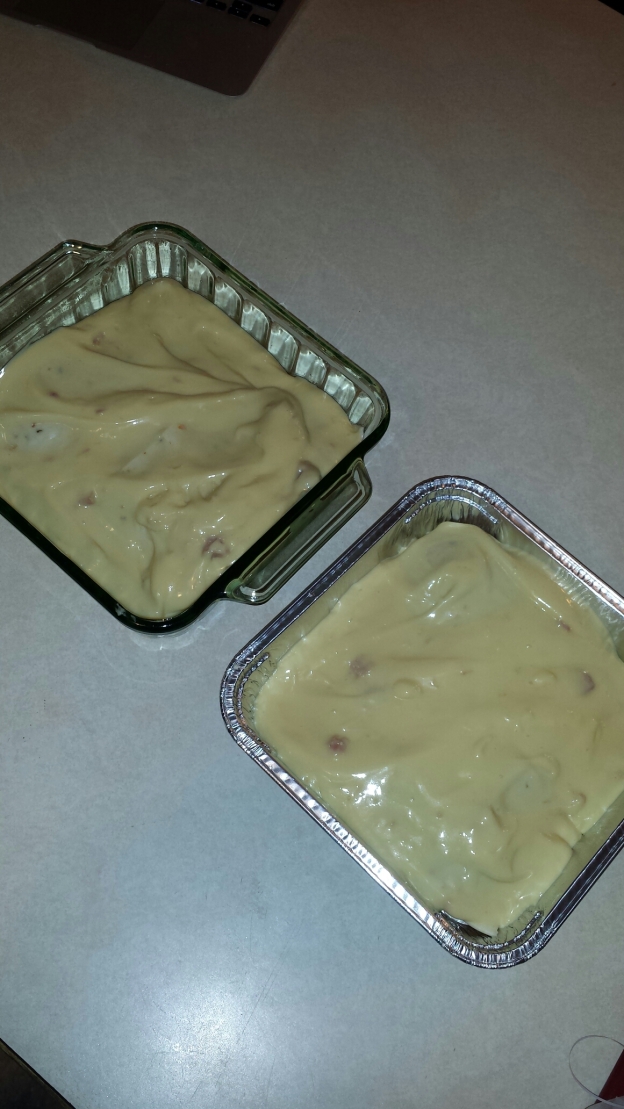
I spray both my freezer pan and glass dish with cooking spray first. Then put my chicken down.

image

Next you want to layer the cheese slices on the chicken.  Four slices work for me in my 8×8 pan,  but I sometimes add one or two more.

image

Now you want to combine the milk and can of Cream of Chicken.  I do one at a time just to make it easier. Combine one,  add it on top of the cheese,  combine one and to the other. It looks like yummy cake batter pouring out over the cheese. Just spread it around to fully cover the pan.

image

image

image

Here is where you split. If making two, cover your dish you’re freezing,  label, and add directions of how to finish.

image

To the other you now add half of a package of stuffing and then pour 1/4 cup melted butter on that. Pop it into the oven for 45-60 minutes at 350°.

image

I usually let it cook for the full hour.
Serve it over rice and voila, wonderful dinner that you made 2 of, in about 10 minutes of prep time!
I have also made this with a small bag of frozen broccoli under the cream of chicken mix. It’s a good way to get your veggies in!

image

image

Crowd Pleaser Donuts!

Crowd Pleaser Donuts final

I’ve never been much of a fan of Valentine’s day, I mean,  we should love each other every day, right? (Har har har) This was always a plus for my hubby too. No gifts,  no flowers (even though I usually get some),  no special night out. All of that is pretty much the same but now I have two kids to do fun crafts and food with!
My son has developed my same love for themed foods so i wanted to do something heart shaped for Valentine’s day. While looking through Pinterest,  I found donuts and I thought they would be a “sweet” way to start the day.
Hot oil and I don’t really get along but these were so easy to make! Not to mention, delicious!
Head on over to Little Bit Funky to get her full instruction that I  followed.

So all you need are a can of biscuits, oil, a cinnamon and sugar mix, butter, and something to cut holes or like I did,  a heart shape!
I laid all the biscuits out and used my awesome Dollar Store find, (5 heart shape cookie cutters for $1!) to cut out the centers.

image

image

Once the oil was heated up,  med heat,  in went my dough. Just a couple minutes on each side until they are brown.

image

image

You could stop there but why? After you pull the wonderful fried dough from their oil bath place them on a paper towel lined plate. Then place one side down in melted butter,  flip,  then swirl your buttery donut in the cinnamon and sugar mix.

image

image

image

Take a moment to pat yourself on the back then dig in! These are so good and there are so many toppings you could do.

image

image

I’ve got another Valentine’s day goodie coming up! Stay tuned!

Crab Bites

No matter if it’s Sunday, Monday, Thursday, or Saturday, you’re probably watching football. Let’s face it, the game is always more fun when you invite people over to watch it with you. This delicious appetizer will fill you up and have your guests inviting themselves over for the next game. My hubby LOVES these and it has become a staple snack in our house.  This was given to me from a former co-worker. While I didn’t get this from Pinterest, I hope it will make it now! These are too good not to share.

The best part? You can freeze batches ahead of time and just pop them into the oven as needed!

Crab Bites

Ingredients:

6 English Muffins

5oz Old English Cheese

8oz Crab meat, imitation or real, we prefer the real deal!

1 stick of butter

1/2 tsp salt

1/4 tsp garlic powder

DSC02502


Directions:

1. Combine cheese spread, butter, salt, and garlic powder in a bowl. I like to soften the cheese spread and butter first so its easier to mix and dish out. Then mix in your crab meat.

DSC02509


2. Separate your english muffins into halves, then cut each half into 1/4’s. Then set them out on baking sheets.

DSC02504


3. Scoop out your crab mixture onto each piece if the muffins. About a tablespoon size per piece. You can always go back over with the remainder.

DSC02511 DSC02510


4. Cover with aluminum foil and freeze for at least 1 hour, or even for up to several weeks. When you’re ready, just pop them in the broiler for about 10 min. Just remember to watch them to make sure they don’t burn. Enjoy!

Honey Butter Pork

Honey Butter Pork Final

I love pork, yet cooking it has never been a success of mine. Also, I like things with few ingredients. The easier the better. So when I found this recipe on Pinterest I had to give pork another shot. This recipe fit the bill! What’s not to like? Honey. Butter. Pork. Perfection. The addition of cajun spices interested me more and I knew this would be a hit with the hubby. So here is the recipe thanks to Momma Hen’s Kitchen:

Honey Butter Pork Tenderloin 
Ingredients:
4 tbs butter
2 tbs honey
1 1/2 pounds pork tenderloin, trimmed
1/2 tsp Cajun seasoning
1/2 tsp black pepper
3/4 cup water
Instructions:
1. Preheat oven to 375 degrees.
2. In an ovenproof pot, heat butter and honey over medium heat until melted.
 DSC02304
3. Sprinkle pork tenderloin with Cajun seasoning and black pepper.
4. Brown each side for 5 minutes in the honey butter.  Lower heat if honey begins to burn. (I browned mine 6-7 min at a med heat to get a little more of a sear)
DSC02308
5. Place pot in oven and roast uncovered for 15 – 20 minutes*.  (I cooked mine for 30 min, turning halfway. I also spooned a little of the sauce over the top)
DSC02310
6. Remove pot from oven and transfer the pork to a plate. Cover with foil.
7. Add water to the pot and stir over medium heat.  Simmer for about 5 minutes, until sauce is reduced slightly.
8.Slice pork on the diagonal and drizzle sauce over top to serve.
*NOTE:  May need to cook longer depending on the size and thickness of the pork tenderloin
 DSC02311
I added mashed potatos and green beans to finish the plate. SO good! The next day I used the leftover pork for lunch. Stay tuned for that easy and yummy lunch!