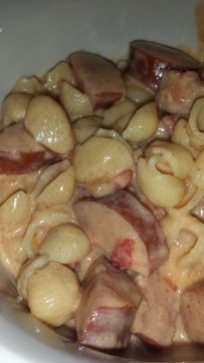
Sausage with Cajun Alfredo

Sausagewithcajunalfredo

I feel like a genius after having made this dinner. This only came about because I thought I had everything I needed for dinner…until time to make dinner and it turns out I had about half. Half one one recipe and half of another.

My first reaction was panic. I’m not usually the “wing it” cook. But, I knew the two recipes well enough that I thought I could mix it. Of course, when Hubs asked what was for dinner I answered with a  “we’ll see!” Turns out, it was a blessing for our tummies!

So I combined my Sausage Pasta with Tomato Cream Sauce (cajun style) with my Cheesy Garlic Chicken Alfredo.

Sausage Cajun Alfredo

You’ll need:


For the Alfredo:
2 cups milk
4 ounces cream cheese (1/2 a block)
2 Tbs flour
½ tsp salt
3 Tbs butter
1 cup grated Mozzarella cheese ( or Cheddar!)20160516_171323.jpg

For the Sausage pasta:
8+ ounces penne pasta (or whatever you prefer, I used small shells)
12 oz smoked sausage or Chicken!
14-oz can petite diced tomatoes with onion, drained well
1 teaspoon garlic powder
1-2 Tablespoons cajun seasoning
Salt and pepper to taste

What to do:

First, I started my pasta cooking and then made the Alfredo just as I do for the regular recipe:

Use a mixer or blender to mix together the milk, flour, salt, and cream cheese until it is smooth. I also added butter to this mix and heated it until it thickens then added the shredded cheese and let it sit.

Then, while those two were going, I sliced up my sausage and sautéed it and then added my tomatoes and onion, garlic and cajun spices, and a little S&P. Mix well

Finally, once my Alfredo was ready I slowly stirred it into my pan of sausage. making sure to coat everything and mix in the cajun spice. Then I added the pasta and mixed again.

This was one of the best outcomes of not having what you need!! This mix may be one of my favorites!

Papa’s Potatoes

Papa's potatoes

These potatoes are one of the greatest grilling sides! Totally credited to my sweet daddy. He was quite the grilling master. We always looked forward to the summer nights that Dad was cooking dinner. Melt in your mouth steaks or juicy burgers were usually on the menu…and potatoes. The best part, for moms everywhere, cooking like this on the grill means little clean up.

My hubby’s parents recently came out here to visit and one of the nights we grilled steaks and I made these potatoes. They were met with rave reviews, especially from my father-in-law, who is also quite the grilling chef!

Easy and delicious. I prefer them cooked on the grill but you can just as easily make them in the oven.

You’ll need:

3 potatoes, peeled and thinly sliced (makes about 6 packets)

1 onion, chopped

Carrots, chopped

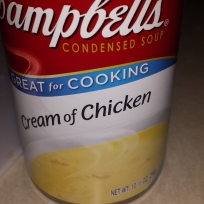
1 or 2 cans of Cream of Chicken or Cream of Mushroom

Salt and pepper to taste

What to do:

Prep your potatoes, onion and carrots and then add them in layers to a large bowl. I add the potato slices lightly salt and pepper them, then add in some carrots and onion, stir, then a little Cream of Chicken. Stir. Repeat. Until all is added to the bowl and well coated.

20160619_154125.jpg

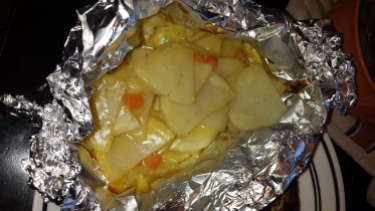
Next tear off a sheet of aluminum and scoop out some of the potato mix to the center.Pull the sides up and fold it down a couple times and then fold in the sides.

20160619_154541.jpg

These cook on the grill or in the oven at 375 degrees for 30-40 min. Careful when you open them. Steam will pour out and your creamy potatoes are piping hot!

Thick cut bacon wrapped steak and green beans are always part of a yummy meal!

20160619_165350.jpg

Kitchen Cleaning Tips: Put to the Test!

Kitchen Cleaning

I am always amazed at the before and after pictures of almost everything on Pinterest. Grow your hair 10 inches in 1 month! Loose 10lbs in 2 weeks! Make cleaning your kitchen easy?

So I decided to put 3 kitchen cleaning tips to the test. My oven, cook top, and microwave get tons of use, as I’m sure is the same in your house. Fair warning, the pictures below are graphic. (HA HA HA)

In my need to spring/summer clean, I wanted something that would work but be relatively easy. Because, who really wants to clean that stuff?  So to Pinterest I go.

Microwave

I figured I should work from the top down. Many years ago, I was a receptionist and part of my job was cleaning up a small kitchen. I learned then this great trick that totally works!

Fill a coffee cup or another microwave container with some water, about 1 cup. Add 1 TBSP white vinegar or a squeeze of lemon into the water and microwave for a couple minutes. The idea is to get the water to steam in the microwave. I always add a wooden stick to the water to keep it from super-heating.

While the microwave and water do the work, I wipe down the outside and front of the microwave.

Carefully remove the cup(it will be hot!) and then wipe out the microwave. I like to use Clorox wipes as I wipe it out. They smell like lemons and are strong enough to scrape away any grime. Boom! Easy Peasy!

Stove Glass Cook Top

So for this one I found several different combinations. I ended up going with the baking soda and white vinegar option since it was what I had on hand and using on the oven. These are from One Crazy House.I sprinkled baking soda on the cook top and then used my spray bottle to  spray that with the vinegar. This was really fun for my son who cheered as it bubbled and foamed.20160602_195709.jpg

Then I used a paper towel and wiped the top. It really cleaned up easily. There were a few burned spots that I had to scrub, but with little effort. It works!

20160602_200648.jpg

Oven

This, my friends, was tough. Our oven was gross. It was pretty clean for quite a while then a couple things exploded and then were cooked on. I know some of you know what I mean.

I found this mix on Viral Inside.

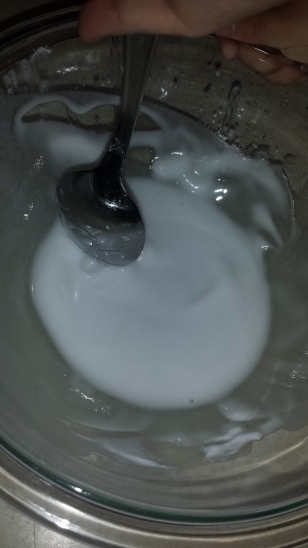
Mix a couple spoons of baking soda with some water in a bowl. You’ll mix it into a paste that is easily applied on the oven’s surfaces.

Then you want to remove the racks and spread the paste on the inside of the oven. It’s suggested to let it sit overnight or for 12 hours.

Then you just take a wet rag and wipe it out. You can also use that vinegar from the cook top cleaning and spray it on the surfaces too as you wipe it out. It does help to get the final bits of baking soda that are dried.20160602_203451.jpg

This worked pretty well, but I still have more cleaning to do. The inside of the door is still grease covered and there are still some stains on the bottom of the oven. I’m thinking I’m going to have to use one of the combos that included Dawn soap.

Bonus! Room Odors

This is a favorite! Room sprays are so expensive and I feel like we burn through them so fast because they don’t smell for long. Let me go ahead and say that this totally works!

This pin from Diply will show you the step by step, but, the spray uses baking soda, Downy Unstoppables, and hot water.

I didn’t use the baking soda, but added the Dreft Blissfuls scent beads (this smell is fresh and calming) to hot water then added to my spray bottle. It smells awesome! And it really lasts.


Magical save your shirt cleaner final

Felt Robot

Make Your Own Felt Robot

Our sweet babysitter is graduating high school. We love her dearly and she is so wonderful with our kids. I asked my son what he wanted to get her for her graduation. Robots. Always his answer. I thought about making a robot card, but still wanting to make her something nicer (because she always does cute crafts with the kids) I headed to Pinterest.

So there we sat, my son in my lap, scrolling all the ideas posted under the search “robot crafts”. Suddenly, my son pointed and yelled, “That one!” A beautiful picture of a felt robot from Mango and Passion Fruit.Felt robot Mangos

I probably won’t ever scroll through Pinterest with my kids again saying I would make what they found. This project was hard. It looks easy and maybe for someone with bit more experience in sewing it would be, but it took me FOR-EV-ER. However, the finished product is great.

So great, that I now have to make another for my son. I had to promise to make him one so I could pry this one out of his hands for our gift.

You’ll need:

Felt (color of choice – I also used a heavier felt – I think the softer might be easier to work with)

Thread (contrasting color or blending color, I used upholstery thread)

Needle

Buttons (for eyes)

Filler (to fill your cubes)

Scissors

Ribbon (for a bow or maybe a bow-tie?)

What to do:

Here are the measurements I used for my cubes:

Body = 8 cm square (6 squares)
Head = 6 cm square (6 squares)
Hands & Legs = 4 cm square (24 squares)

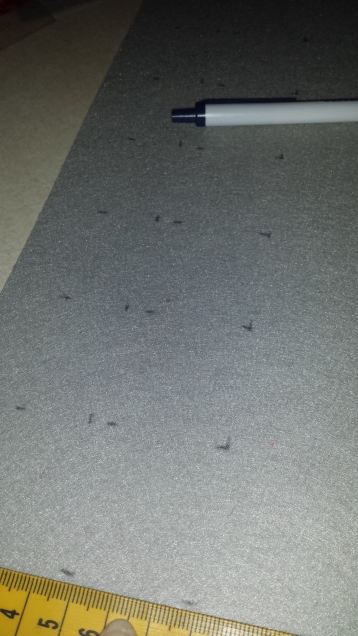
Measure out your squares on the felt and cut them out. I was glad that they didn’t have to be perfect. You want it to have a homemade look.20160603_171410.jpg

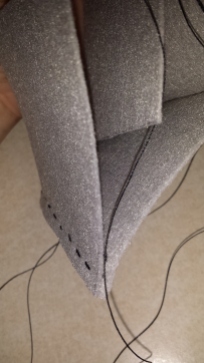
Start with the feet and hand boxes and a long strand of thread that is doubled. Sew one end of two pieces together. At the end of that end start the next square, it will usually be the top or bottom square. Repeat. Repeat. Until you have a cube. Remember to leave an opening big enough to add your filler.

Once you finish your 4 small cubes for the feet and hands you can add your embellishments to the “face” of the robot. I added 2 black buttons for eyes and used my thread to make lashes. Of course, no girl robot is complete without a pink bow, right?

I found a Pin on tying a small bow using a fork. It was easy enough, although mine didn’t turn out as cute. Again…homemade!

Then you can sew your head cube together using the same method as the the feet and hands.20160604_015032.jpg

Finally we get to the body of the robot. I started by sewing the four sides together, then adding the bottom square to the front square. Then I added an arm to each side. I sewed through the edge of the cubes onto the sides of the body. It felt most secure this way. I then repeated this with the feet. After those were on I finished sewing the bottom square to the other sides.

Now for the head! I sewed the top square of the body to the front body square. Then attached the head cube to that. Once everything was secure, I finished attaching the top square of the body cube to the sides and stuffed.

Here she is! Soon to have a brother! This really did turn out well. If you have a kiddo that loves robots this would make for a nice keepsake.

We also made her this robot gift card holder. Hope she loves robots (ha ha ha)! (The gift card is on the robots chest under the “buttons”)


Earth Day SuncatcherLollypop Bouquets final